Thursday, November 10, 2011

Thursday, March 25, 2010
Getting started with Enterprise Library
As Software developers we experience common problems like Logging, Validation, Caching, Data access, Exception handling in our each and every software solutions. Implementing logging infrastructure or data access logic for every project is waste of time. Enterprise Library is set of best practices which recommended by Microsoft to be used in small to enterprise level applications.
Features come with Enterprise Library 4.1 (October 2008)
- Caching Application block
- Cryptography Application block
- Data Access Application block
- Exception Handling Application block
- Logging Application block
- Policy Injection Application block
- Security Application block
- Unity Application block
- Validation Application block
Goals for Enterprise Library
Enterprise Library is a collection of application blocks and services intended for use by developers who build complex, enterprise-level applications. These applications are typically deployed widely and have interdependencies with other application and systems. In addition, they generally have strict security, reliability, and performance requirements.
The goals of Enterprise Library are the following:
- Consistency. All Enterprise Library application blocks feature consistent design patterns and implementation approaches.
- Extensibility. All application blocks include defined extensibility points that allow developers to customize the behavior of the application blocks by adding their own code.
- Ease of use. Enterprise Library offers numerous usability improvements, including a graphical configuration tool, a simpler installation procedure, and clearer and more complete documentation and samples.
- Integration. Enterprise Library application blocks are designed to work well together and are tested to make sure that they do. It is also possible to use the application blocks individually.
Getting started with Enterprise Library
- Download latest version from Microsoft
or
- Installing


Note: We need to install enterprise library only on Developer machines, no need to install it on deployment/production machines. Only required Enterprise library dlls should be copied to solutions bin folder or GAC.
- Referencing Enterprise Library common files to Visual Studio project.
Add a reference to the application block assembly (For demo purpose I am going to use Logging application block.)
In Visual Studio, right-click your project node in Solution Explorer, and then click Add References. Click the Browse tab, and then find the location of the application block assembly and select Microsoft.Practices.EnterpriseLibrary.Logging.dll and click ok.
Use the same procedure to set a reference to the Enterprise Library Common assembly, Microsoft.Practices.EnterpriseLibrary.Common.dll and to the ObjectBuilder assembly, Microsoft.Practices.ObjectBuilder2.dll
Now open the source code file (e.g Program.cs) and add following namespace on top of the code.
using Microsoft.Practices.EnterpriseLibrary.Logging;
- Adding Configuration entry to App.Config / Web.Config
Right click on app.config or web.config file of your project and click on Edit Enterprice Library Configuration as sown bellow,
Now right click on config file node from node tree and select New -> Logging Application Block as shown bellow,
Now you can see default logging config settings are displaying in the node tree.
Also it has added a Formatted
Event Log Trace Listener to the Event Listeners section. - Now we are ready to go with Enterprise Library. Following is a simple example of writing Log entry to events log using Logging application block,
using System;
using System.Collections.Generic;
using System.Linq;
using System.Text;
using Microsoft.Practices.EnterpriseLibrary.Logging;
namespace EntLibDemo
{
class Program
{
static void Main(string[] args)
{
LogEntry logEntry = new LogEntry();
logEntry.EventId = 100;
logEntry.Priority = 2;
logEntry.Message = "Informational message";
logEntry.Categories.Add("Trace");
logEntry.Categories.Add("UI Events");
Logger.Write(logEntry);
}
}
}


See how easy to use Enterprise library and the Enterprise library configuration utility save us lots of time and now we can focus more on development of business features.
Download Source Code for this post.
Download PDF version of this post.
Resources
Download Enterprise Library 4.1 (Oct 2008)
Patterns & Practices – Enterprise Library latest on Codeplex
Saturday, March 20, 2010
My First NHibernate application
- Download NHibernate from http://www.nhforge.org
- Create New Visual Studio project (i name it NHibernateDemo)
- Add an assembly reference to NHibernate.dll
For this example I am using NHibernate-2.1.2
Also copy files from NHibernate-2.1.2.GA-bin\Required_For_LazyLoading\LinFu folder
which contains supporting files for lazy loading to your Bin folder. - Create database tables
tblEmployee - Maintain employee information
tblSkill - Maintain simple list of skills with ID and Title
tblEmployeeSkill - Mapping table of employee and skill (many-to-many relation)
CREATE TABLE tblEmployee(
EmployeeID int IDENTITY(1,1) NOT NULL,
FistName nchar(50),
LastName nchar(50)
DOB datetime,
HomeAddress nchar(100)
)


CREATE TABLE tblSkill(
SkillID int IDENTITY(1,1) NOT NULL,
Title nchar(50)
)


CREATE TABLE  tblEmployeeSkills(
EmployeeID int NOT NULL,
SkillID int NOT NULL,
AssignedDate datetime
)
- Create Business classes
Every property of our class should be virtual.
public class Employee { public virtual int EmployeeID { get; set; } public virtual string FirstName { get; set; } public virtual string LastName { get; set; } public virtual DateTime DateOfBirth { get; set; } public virtual string HomeAddress { get; set; } public virtual IListSkills { get; set; } } public class Skill { public virtual int SkillID { get; set; } public virtual string Title { get; set; } }
Because if you need lazy loading to be enabled you must mark each property as virtual. Then the nhibernate can create required proxy class for our class types. For more info about this please read this post by Davi Brion.
Also the collection types should be IList<> or ISet. (e.g. List)
- Create NHibernate mappings (hbm)
Create new XML file and name it DemoMappings.hbm.xml
(For this example i am using a single file to contain all the classes mappings. But you can create any number of individual XML files for each mapping)
Also remember to set Build Action property to Embedded Resource of DemoMappings.hbm.xml file.
TIP : For visual studio intelisence for XML file please set Schema of the XML file to nhibernate-mapping.xsd . which can be found in NHibernate bin folder.
<?xml version="1.0" encoding="utf-8" ?>
<hibernate-mapping xmlns="urn:nhibernate-mapping-2.2"
namespace="NHibernateDemo.BusinessObjects" assembly="NHibernateDemo">

<class proxy="Skill" table="tblSkill" name="Skill">
<id name="SkillID" column="SkillID" type="Int32">
<generator class="identity"></generator>
</id>
<property name="Title" column="Title" type="string" length="50"></property>
</class>


<class proxy="Employee" table="tblEmployee" name="Employee" lazy="true">
<id name="EmployeeID" column="EmployeeID" type="Int32">
<generator class="identity"></generator>
</id>

<property name="FirstName" column="FirstName" type="String" length="50"></property>
<property name="LastName" column="LastName" type="String" length="50"></property>
<property name="DateOfBirth" column="DOB" type="DateTime"></property>
<property name="HomeAddress" column="HomeAddress" type="String"></property>

<bag table="tblEmployeeSkills" name="Skills" lazy="false">
<key column="EmployeeID"></key>
<many-to-many class="Skill" column="SkillID"></many-to-many>
</bag>
</class>
</hibernate-mapping>
- Configure NHibernate
Create hibernate.cfg.xml and set Copy to Output to Copy Always. And copy paste following,
(If you didn’t do above then you will get error somewhat like: An exception occurred during configuration of persistence layer.)
<?xml version="1.0" encoding="utf-8" ?>
Tip : List of supported databases and connection configuration settings
<hibernate-configuration xmlns="urn:nhibernate-configuration-2.2">
<session-factory>
<property name="connection.provider">
NHibernate.Connection.DriverConnectionProvider</property>
<property name="dialect">NHibernate.Dialect.MsSql2005Dialect</property>
<property name="connection.driver_class">NHibernate.Driver.SqlClientDriver</property>
<property name="connection.connection_string">
Data Source=.\sqlexpress;Initial Catalog=DemoDB;Integrated Security=True
</property>
<property name="show_sql">true</property>
</session-factory>
</hibernate-configuration>
http://community.jboss.org/wiki/DatabasessupportedbyNHibernate
- Creating a Employee using NHibernate
using System;
using System.Collections.Generic;
using System.Linq;
using System.Text;
using NHibernate.Cfg;
using NHibernateDemo.BusinessObjects;
using NHibernate;

namespace NHibernateDemo
{
class Program
{
private static ISessionFactory _sessionFactory;

private static ISessionFactory SessionFactory
{
get
{
if (_sessionFactory == null)
{
var configuration = new Configuration();
configuration.Configure();
configuration.AddAssembly(typeof(Employee).Assembly);
_sessionFactory = configuration.BuildSessionFactory();
}
return _sessionFactory;
}
}

public static ISession OpenSession()
{
return SessionFactory.OpenSession();
}

static void Main(string[] args)
{
Employee employee = new Employee()
{
FirstName = "Dilhan",
LastName = "Jayathilaka",
DateOfBirth = DateTime.Now,
HomeAddress = "Some address."
};

employee.Skills = new List();
employee.Skills.Add(new Skill() { SkillID = 1 });

using (ISession session = OpenSession())
{
using (ITransaction transaction =
session.BeginTransaction())
{
session.Save(employee);
transaction.Commit();
}
}
}
}
}
Tip: creating ISessionFactory is an expensive process and avoid creating ISessionFactory more than one instance per application. As shown above you can create static variable to keep it for entire life of the application. ISession is a light wait and you can create it for every action in your application.


Wednesday, March 3, 2010
SharePoint Discussion board reply without previous posts content.
1. Open Discussion Board -> NewForm.aspx using SharePoint Designer
2. Paste following javascript code to bottom of the "MainContentPlaceHolder"
<script language="javascript" type="text/javascript">
    var d = document.getElementsByTagName("textarea");
    for( var i=0; i < d.length; ++i){
        if( d[i].id.indexOf('TextField') != 0 ){
        d[i].value = " ";
        }
    }
</script>
Saturday, February 20, 2010
Query XML String as a SQL Table.
This is very useful is you want to parse bulk data into sql server stored procedure.
For this example I am using ArrayList of my “Test” class. And using XmlSerializer I am going to convert it in to XML. For demonstration purpose I am just declare a SQL variable “@XMLString” to hold xml data.
declare @XMLString xml

set @XMLString = '?<ArrayOfTest>
<Test>
<TestID>1</TestID >
<TestName>ASP.NET Test</TestName>
<TestDuration>2 Hrs</TestDuration>
</Test>
<Test>
<TestID>2</TestID>
<TestName>SharePoint Test</TestName>
<TestDuration>2 Hrs</TestDuration>
</Test>
<Test>
<TestID>3</TestID>
<TestName>SQL Server Test</TestName>
<TestDuration>2 Hrs</TestDuration>
</Test>
</ArrayOfTest>'
Now we can perform query against @XMLString using nodes function and xpath.
select TableAlias.ColumnAlias.value('TestID[1]','VARCHAR(20)') ,
TableAlias.ColumnAlias.value('TestName[1]','VARCHAR(20)') ,
TableAlias.ColumnAlias.value('TestDuration[1]','VARCHAR(20)')

from @XMLString.nodes('//ArrayOfTest/Test')TableAlias(ColumnAlias)
Example 2:
Here is an example of little advanced filtering with XPath.
select TableAlias.ColumnAlias.value('TestID[1]','VARCHAR(20)') ,
TableAlias.ColumnAlias.value('TestName[1]','VARCHAR(20)') ,
TableAlias.ColumnAlias.value('TestDuration[1]','VARCHAR(20)')
from @XMLString.nodes('//ArrayOfTest/Test[TestID >= 2]')TableAlias(ColumnAlias)
Download Source
Click here to Read MSDN for more info
Sunday, January 10, 2010
Discussion board anonymous reply with custom view
We can achieve this requirement by adding new list view template to Discussion List, i will call it "Flat Anonymous".
Steps,
1. Open FEATURES\DiscussionsList\schema.xml
(Exact Path : Program Files\Common Files\Microsoft Shared\Web Server Extensions\12\TEMPLATE\FEATURES\DiscussionsList\schema.xml)
(don't forget to Backup schema.xml file before doing any modifications)
2. Find PersonViewMinimal
3. Create a copy and name it PersonViewMinimalExtended
4. it should look like following
<Field ID="{b4ab471e-0262-462a-8b3f-c1dfc9e2d5fd}" Name="PersonViewMinimalExtended" DisplaceOnUpgrade="TRUE" Group="_Hidden" Filterable="TRUE" Sortable="TRUE" Type="Computed" DisplayName="$Resources:core,Posted_By;" ReadOnly="TRUE" AuthoringInfo="$Resources:core,picture_and_name;" SourceID="http://schemas.microsoft.com/sharepoint/v3" StaticName="PersonViewMinimalExtended">
<FieldRefs>
<FieldRef ID="{d31655d1-1d5b-4511-95a1-7a09e9b75bf2}" Name="Editor" />
<FieldRef ID="{adfe65ee-74bb-4771-bec5-d691d9a6a14e}" Name="PersonImage" />
<FieldRef ID="{bd2216c1-a2f3-48c0-b21c-dc297d0cc658}" Name="IsRootPost" />
</FieldRefs>
<DisplayPattern>
<Switch>
<Expr>
<Field Name="IsRootPost" />
</Expr>
<Case Value="TRUE">
<HTML><![CDATA[<table cellpadding="0" cellspacing="0"><tr><td style="padding-left: 5px;">]]></HTML>
<Field Name="PersonImage" /><HTML><![CDATA[</td></tr><tr><td style="padding-left: 5px;" nowrap>]]></HTML>
<Field Name="Editor" /><HTML><![CDATA[</td></tr></table>]]>
</HTML>
</Case>
<Default>
<HTML><![CDATA[ ]]></HTML>
</Default>
</Switch>
</DisplayPattern>
</Field>
and create a copy from that view (
and Change display name to DisplayName="Flat Anonymous"
from newly copied view
Then select "Flat Anonymous" as the template.
Wednesday, November 11, 2009
Monday, October 26, 2009
Re-using SharePoint controls
Friday, October 2, 2009
Monday, August 24, 2009
Deep Dive into the SharePoint Content Deployment and Migration API
Monday, August 17, 2009
SharePoint Planning Visio Diagrams
http://technet.microsoft.com/en-us/library/cc263199.aspx
Models
Model: Business Intelligence
Model: Office SharePoint Server Application Security
Model: Office SharePoint Server Backup and Restore
Model: Office SharePoint Server Topologies
Model: Office SharePoint Server Baseline Site Hierarchies
Model: Office SharePoint Server Customization
Model: Office SharePoint Server Database Administration
Model: Office SharePoint Server Enterprise Content Management
Model: Office SharePoint Server Extranet Topologies
Model: Office SharePoint Server Inter-Farm Shared Services
Model: Office SharePoint Server Products Migration
Model: Office SharePoint Server Search Administration
Model: Office SharePoint Server Shared Services
Model: Upgrading Office SharePoint Server Products
Model: Upgrading SharePoint Portal Server 2003 to Office SharePoint Server (1 of 2)
Model: Upgrading SharePoint Portal Server Version 2 to Office SharePoint Server (2 of 2)
Scenarios
Scenario: Enterprise Content Management
Scenario: InfoPath Forms Services Customer Interaction Form
Scenario: InfoPath Forms Services Expense Reporting
Scenario: InfoPath Forms Services Insurance Claims
Scenario: InfoPath Forms Services Permits
Scenario: InfoPath Forms Services Supplier Survey
Scenario: Keeping Connections to Data Sources Current
Scenario: Large Corporate Internet Site (Infrequent Changes to Web Content)
Scenario: Office SharePoint Server Call Center
Scenario: Office SharePoint Server Corporate Intranet Portal Site
Scenario: Office SharePoint Server Departmental Portal Site
Scenario: Office SharePoint Server Equities Research
Scenario: Office SharePoint Server Informational Portal Site
Scenario: Office SharePoint Server Out-Hosted Portal Sites (ASPs)
Scenario: Online News Internet Site (Frequent Web Content Updates and Searching)
Scenario: Preserving “One Version of the Truth” for Distributed Workbooks
Scenario: Records Management in Office SharePoint Server
Scenario: Rendering Data from Spreadsheets to Web Parts
Flowcharts
Office SharePoint Server Planning Flowchart, Part I (application administrators)
Office SharePoint Server Planning Flowchart, Part II (IT pros)
Office SharePoint Server Deployment Flowchart
For more on Visio and SharePoint, see:
Integrating Visio 2007 with Microsoft Technologies
Visio Services and SharePoint 2010
Wednesday, July 8, 2009
Using Jquery with ASP.NET simple example.
download source code for this example download
Prerequisites
Download jquery java script library from http://jquery.com/
Steps
1. Create new web site

1. Add jquery java script file(s) to solution.


2. Create new page (ajax_page.aspx) and add following code.
C# ajax_page.aspx.cs
using System;
using System.Collections.Generic;
using System.Linq;
using System.Web;
using System.Web.UI;
using System.Web.UI.WebControls;
public partial class ajax_page : System.Web.UI.Page
{
protected void Page_Load(object sender, EventArgs e)
{
string sampleJSONObject =
"{\"FullName\" : \"Dilhan Jayathilaka\", \"Email\" : \"dilhan.jayathilaka@live.com\"}";
Response.Write(sampleJSONObject);
Response.End();
}
}
3. Add javascript to call ajax page using jquery.
default.aspx
<%@ Page Language="C#" AutoEventWireup="true" CodeFile="Default.aspx.cs" Inherits="_Default" %>
<!DOCTYPE html PUBLIC "-//W3C//DTD XHTML 1.0 Transitional//EN" "http://www.w3.org/TR/xhtml1/DTD/xhtml1-transitional.dtd">
<html xmlns="http://www.w3.org/1999/xhtml">
<head runat="server">
<title></title>
<script src="jQuery/jquery-1.3.2.js" type="text/javascript"></script>
<script language="javascript" type="text/javascript">
// JQuery ajax call.
$.getJSON("ajax_page.aspx", function(json) {
$("#txtFullName").html(json.FullName);
$("#txtEmail").html(json.Email);
});
</script>
</head>
<body>
<form id="form1" runat="server">
<div>
<span id="txtFullName" ></span>
<br />
<span id="txtEmail" ></span>
</div>
</form>
</body>
</html>
Open Source JQuery ASP.NET - (DJ - jQuery Web Contorls for ASP.NET)http://dj.codeplex.com/
Wednesday, July 1, 2009
.NET Software Engineers Tool Set
Documentation Tool
The patterns & practices: Documentation Tools project includes a Word 2007 template and tools that you can use to convert Word documents to HTML, Help 1.0 (CHM), and Help 2.0 (HxS). It also includes a tool that helps you manage your table of contents for large documentation sets. You can use these tools to create your own documentation guidance or take existing patterns & practices Word documents, modify the content, and then convert the content to your desired output.
download and read more : http://www.codeplex.com/doctools
Debug View
DebugView is an application that lets you monitor debug output on your local system, or any computer on the network that you can reach via TCP/IP. It is capable of displaying both kernel-mode and Win32 debug output, so you don't need a debugger to catch the debug output your applications or device drivers generate, nor do you need to modify your applications or drivers to use non-standard debug output APIs.
download and read more : http://technet.microsoft.com/en-us/sysinternals/bb896647.aspx
Web Debugging Proxy - Http Viewer
Fiddler is a Web Debugging Proxy which logs all HTTP(S) traffic between your computer and the Internet. Fiddler allows you to inspect all HTTP(S) traffic, set breakpoints, and "fiddle" with incoming or outgoing data. Fiddler includes a powerful event-based scripting subsystem, and can be extended using any .NET language.
Fiddler is freeware and can debug traffic from virtually any application, including Internet Explorer, Mozilla Firefox, Opera, and thousands more.
download and read more : http://www.fiddler2.com/fiddler2/
Monday, June 22, 2009
Copy Dll from GAC
For example if you want to copy System.Data.Linq.dll then you have to enter following,
cd WINDOWS\ASSEMBLY\GAC_MSIL\System.Data.Linq\
windows stores GAC assemblies at (windows\assembly\GAC_MSIL\
now type DIR to list all files/folders inside that folder.

Now you can see a folder(s) with version number and key.
(This is the place where actual dll file is saved inside GAC)

Monday, May 4, 2009
Add Top Link to MySite from Central Admin
1. Go to Central Administration Site
2. Go to Share Service Provider Settings
3. click on Personalization site links from User Profiles and My Sites group
4. Add new link with following pattern. ( http://yourportal/?# )
NOTE : dont forget "?#"
Friday, April 10, 2009
Thursday, April 2, 2009
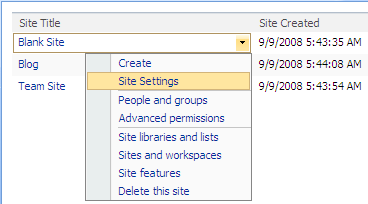
SPGridView add menu

Wednesday, April 1, 2009
Workflow Task forms (Multiple task forms)
Add an element to the Metadata element of the workflow template definition. This element is TaskID_FormURN Element (Workflow), where N represents the integer you assigned to that task type within the workflow. Set this element to the URN of the Office InfoPath 2007 form you want to use with this task. For example:
…
urn:schemas-adventureworks-com:workflow:ReviewRouting-Review
…
To differentiate the task types that your workflow creates, you assign each task type an integer identifier within that workflow. The first task type is 0, the second 1, and so on. This enables you to assign different content types, and different forms, to each task type. These task type identifiers must be unique only within a given workflow. For example, any workflow that creates a task has a task 0 task type; however, the task type does not have to be the same across all workflows.